This is how our pantry doors looked before...
Basic white...fiberglass...no-character. Boring.
I got the idea in my mind that I wanted to salvage some antique doors to replace them. I began looking for a short while, but realized that this search could go on forever. They would need to be the right dimensions for height and width AND I would need to find two that match since they are french doors. Not to mention, I'd have to find the exact look that my picky little designing brain had in mind.
So, with a stroke of genius, I did what I always seem to do in the end. I just used what I had.
I figured with the right touch I could antique and distress the existing doors for a similar effect. And if down the road the perfect doors happen to fall into my lap, nothing lost.
I drooled over lots of antique doors with aged patina to decide what look I wanted.
This one had the look of rusted iron. with turquoise and brown.
This one was a gorgeous solid turquoise distressed with white underneath and decorative iron accents. I LOVED the color but thought with two big doors it might be a little overwhelming and I would hate to grow tired of it.
I liked how this one showed wood of various shades with bits of color underneath. It was understated but beautiful.I found the picture on pinterest and the price of the door was $1,600!
Finally, I thought this one had just the right balance of dark wood with pops of color and I liked how the wood was decoratively carved.
I bought some decorative wood pieces from Home Depot and 4 decorative iron scrolls from Hobby Lobby for $2-3 a piece.

I applied the decorative wood pieces to the center of each door with wood glue, held in place with tape until it dried.
I primed both doors with a gray primer.

Then, I used Minwax Gel Stain in Dark Walnut to give the faux wood look. I just followed the instructions on the can, brushing in the direction of the grain in sections.
When that was all done, I went over the dried stain in small pieces with SW Tantalizing Teal...
Stepped back, and thought to myself this might be a disaster.
I texted Sean to not freak out when he got home because they were NOT done yet. I took a deep breath and thought "Just keep going. It always gets worse before it gets better."
I sanded down the turquoise spots to rough it all up and blend the edges so the painted spots were not defined.
From there, the process was just artistic freedom. I went back over several of the turquoise spots with the gel stain to kind of 'bury' the turquoise underneath, but I left some to stand out bright. I watered down a golden brown paint to highlight spots for a more realistic wood look.
The last step was to apply the iron pieces.
Are you ready?
Before:

AFTER:
I love LOVE L.O.V.E them!

Standing opposite the white cabinets, they really blend in well with an old-world, earthy feel.
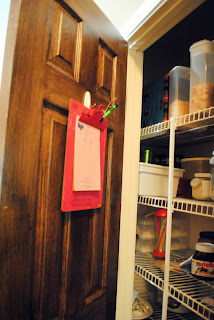
I used a command hook on the inside of one door to hang a clipboard with a notepad for the grocery list. It's been the best grocery list method by far!

It sure was a gamble. Ahhh...success.
Check back!
Katie
Follow @ktgray13


I LOVE this! Great job!! thanks for sharing.
ReplyDelete