Showing posts with label DIY Projects. Show all posts

Monday, April 15, 2013

Kitchen Updates...It's almost done!


 I finished alot of updates on the kitchen a few months ago...
And then kinda forgot I had taken these pictures :) 
Only 3 lonely to-do's remain on the Kitchen To-Do List. Sometimes I have to look back just to remember how far this kitchen has come.

I re-painted the walls from "Hot Chocolate" to "Partridge Gray":
(And, you've seen my wine rack already)


Installed open shelving over the secretary to display white flea market ceramics:


Enlarged a wedding photo of our cake-feeding fun, mod-podged it onto foam-board, and hung it with an old iron skillet where I painted "Happiness is homemade":


Took down my tiny framed chalkboard and went all in with a chalkboard wall for menus and schedules:


 Added an over-door shelf on the doorway leading to the dining room:


Re-purposed a white ceramic hippo planter into a cloth napkin holder:


 Hung an antique wood shelf in the breakfast nook for more open display:


Like an old family photo of lovebirds behind a heart-shaped cookie cutter:


And praying angels on a pedestal beside my favorite picture of my grandparents:


 Placed my favorite fedora, Sean's favorite fedora, and Sean's grandfather's old newsboy cap on coat hooks behind the reading chair:


Brought in a throw-back diy project from the early blogging days with this serving tray for candles and cotton: 


 Removed the shades from this chandelier and removed the fabric from the cornice boxes, added wood appliques, and painted them white:


 A little before and after action?


It probably took 86 projects to get it to this point, but I think it shows! It feels polished but aged, cozy but airy. And it's almost right where I want it to be.

Happy Monday!
Katie

Wednesday, April 10, 2013

Navy, Herringbone Dresser for Living Room


I'm still here...Busy and productive as ever. Just simply enjoying more "doing" and less "sharing" as before I guess! I will share another piece added to our living room that really anchored the space and made it feel so much more like home. For our large living space, I pulled all the furniture closer into the center, leaving more room between the sofa and the wall. I hate to have anything hanging on the wall without something below to "ground" it, so I brainstormed a piece to use on this wall that would still allow enough pass-through space for us to walk out into the porch. I LOVE a dresser in the living room!! I've seen it alot lately and they're often paired with lamps and artwork...AND provide a ton more storage.

This is the old dresser I started with:


 Because it was not solid wood, stripping and restaining it, like I originally wanted, was a no-go.

And because the top was so badly water-damaged, paint was not going to cover it there. 
I needed to paint the bottom and somehow cover the warped top surface. 

I remembered seeing a herringbone patterned stained table top from Thistlewood Farms using paint sticks, so that was my game plan for the top.

For the rest...
I could've gone turquoise.


 Or rustic black.


Or clean white.


 But I wanted something to stand out against our white walls and something more classic, so I decided on navy. I used Krylon's Oxford Blue spray paint after priming.

The top was not difficult, only time consuming. But I found it therapeutic and calming. I took my time putting my puzzle together and wood-glued the paint sticks (which I cut with a miter box and saw) in the herringbone pattern until it was all covered. Sanded, Stained, Poly'd. DONE!

The navy color you see in the above photo is closer to reality...Somehow the pictures inside look way more blue. It wasn't a good day for picture taking so they're all terrible, but it looks AMAZING with antique brass hardware and the Dark Walnut stained top!!

 It can be the perfect toy stow-away when future kids are using our living room as a playground. Everything can be out of site but in reach.


I'm a little obsessed with the top. It was a slight labor of love so I find myself running my hand across it every time I walk by. It's so rich and pretty!


~The Grays

Friday, February 1, 2013

DIY Over-Fridge Wine Rack


I built me a wine rack, yall!

Our kitchen has been undergoing alot of character building lately. What was an outdated, blank-slate kitchen with no built-ins or "character nooks", is now becoming a more customized and functional space. You can remind yourself how our kitchen started here and here and here

The mini-cabinets everyone has over the refrigerator were never used for much in our house. 

Before:

I decided to create a built-in wine rack to utilize and showcase the space, like this picture shows.


I loved the look of the X cube wine racks, like this one from Pottery Barn.


I considered buying a ready-made wine rack with the correct dimensions and placing it inside. 
I couldn't let myself do that. It's too easy.
Duh.

I couldn't even buy wood for the slats at Lowes or Home Depot. So this is what I did...

I first removed the doors, then the random assortment of screws, pictures, magnets, and a wedding invitation I had misplaced before rsvp-ing...oops.
 

I sawed off the center vertical piece of wood then painted the inside to match the cabinets. 

I found 2 wood crates at Jo Anns ($12 each) that when placed side by side were the perfect length to fill the cabinet.
 

 I painted both crates the same color.

I bought 2 pieces of scrap shelving from ReStore for $2 each and cut my pieces to create the "X" slats to separate. 
 
For each crate, I needed one 19.5"x9.25" piece.
 
And two 9.25"x9.25" square pieces.

 I placed the 3 wood pieces inside to insure that they fit, then used mending plates to connect the 2 smaller pieces. 

 
I screwed the mending plate into the front facing side, bracing the two small pieces together like a bridge over the long piece.

 
Then, I slid it out...

 
 and flipped those pieces so that the mending plate was now at the back of the crate. 
 
I placed the large piece in between, and installed the second mending plate on the front facing side. This way, the 2 separate pieces were connected at the front and the back.

 
 I painted everything and waited so impatiently for it to dry.
  
I ended up needing to saw about 1/8th of an inch from the inside edge of the open cabinet to have just enough room to slide the crates inside.  It just took a minute.

And with that, it was done!

 I propped my wine painting from my old apartment on a brick over the cabinet, with a wine bottle, wine jug, and wine glass.


Now I most certainly need more than 6 bottles of wine. 
I will need to buy some more.

Darn.

Two, $12 crates + $4 in scrap shelving + paint and mending plates on hand = $28 wine rack. 
But having the wine so accessible at my fingertips...

Priceless.
OR dangerous.
We'll see... 

Be Merry!
Katie

Thursday, January 17, 2013

Fresh and Airy Art Studio


 I just recently got around to giving my art room a fresh coat of paint and a carpet removal. For 2 years, I tolerated the electric lime and raspberry splashed on the walls of this room, for lack of energy and lack of time. I just couldn't bare to paint another room or rip more strips of carpet. 

Before:
 

But now its done and I can paint and create without getting a headache!  

After:


First up was removing the beige carpet, already spotted with multiple uh-ohs from paint splatters and spills. After tossing it all out, I gave the subfloor a sweeping, caulked and wood-filled the gaps, and then sanded it all lightly to make smooth. I used SW Porch and Floor Paint in Glidden's Olivewood (2 coats), coated with Pro Finisher Water Based Polyurethane (2 coats) then installed quarter round to the base board. Phew!! The floor process was a little tiresome, but not difficult to complete. 

Finally, the walls were painted in SW Fragile Beauty.

It's fresh and clean. An airy, blank slate for injecting color into works of art. 


I still use my Meemaw's butcher block that I painted white and stocked with art supplies. 
(On the shelf; my abstract straw art from first grade :)


On one open wall, I hung my open back frames that had been dispersed among closets and shoved in corners. Now they're visible, accessible, and look pretty cool while waiting for the canvas to fill them.


On the opposite wall I hung random pieces of art, paintings that don't have a place in our house, and some paintings just waiting to be painted over.

I love the color and sheen of the floors and they wipe up easily. 
I keep the bulk of the art supplies and crafty things tucked away in the closet to maintain a clean and open space.

I keep it quiet in here. 
Billie Holiday sings. I paint. 
Winning combination.


Have a wonderful weekend!
Katie

Friday, January 4, 2013

Industrial, Aged Coffee Table ReDo


 I first diy'd this flea market coffee table while living in our college rental house. It was given a nice little facelift with a simple stain and paint treatment and fit well with our standard contemporary style at the time.

Before:
  

But in our current living room, it was too bland and needed a little more attention to make a statement. I loved the look of the industrial cart coffee tables, with hinges, bolts, and various other hardware pieces. I really wanted to find an old cart or door to use, but decided to give that look to the table we already had. I tried to find large casters that could be attached to the underside after cutting the legs off, but couldn't find any I liked, so I put that on the back burner.

I sanded her down.


 Rounded the edges with extra sanding (for a worn effect and future little ones)


 Then abused it with a hammer and nails for an aged look. I beat it in spots and drug the claw in streaks until I had what I wanted.


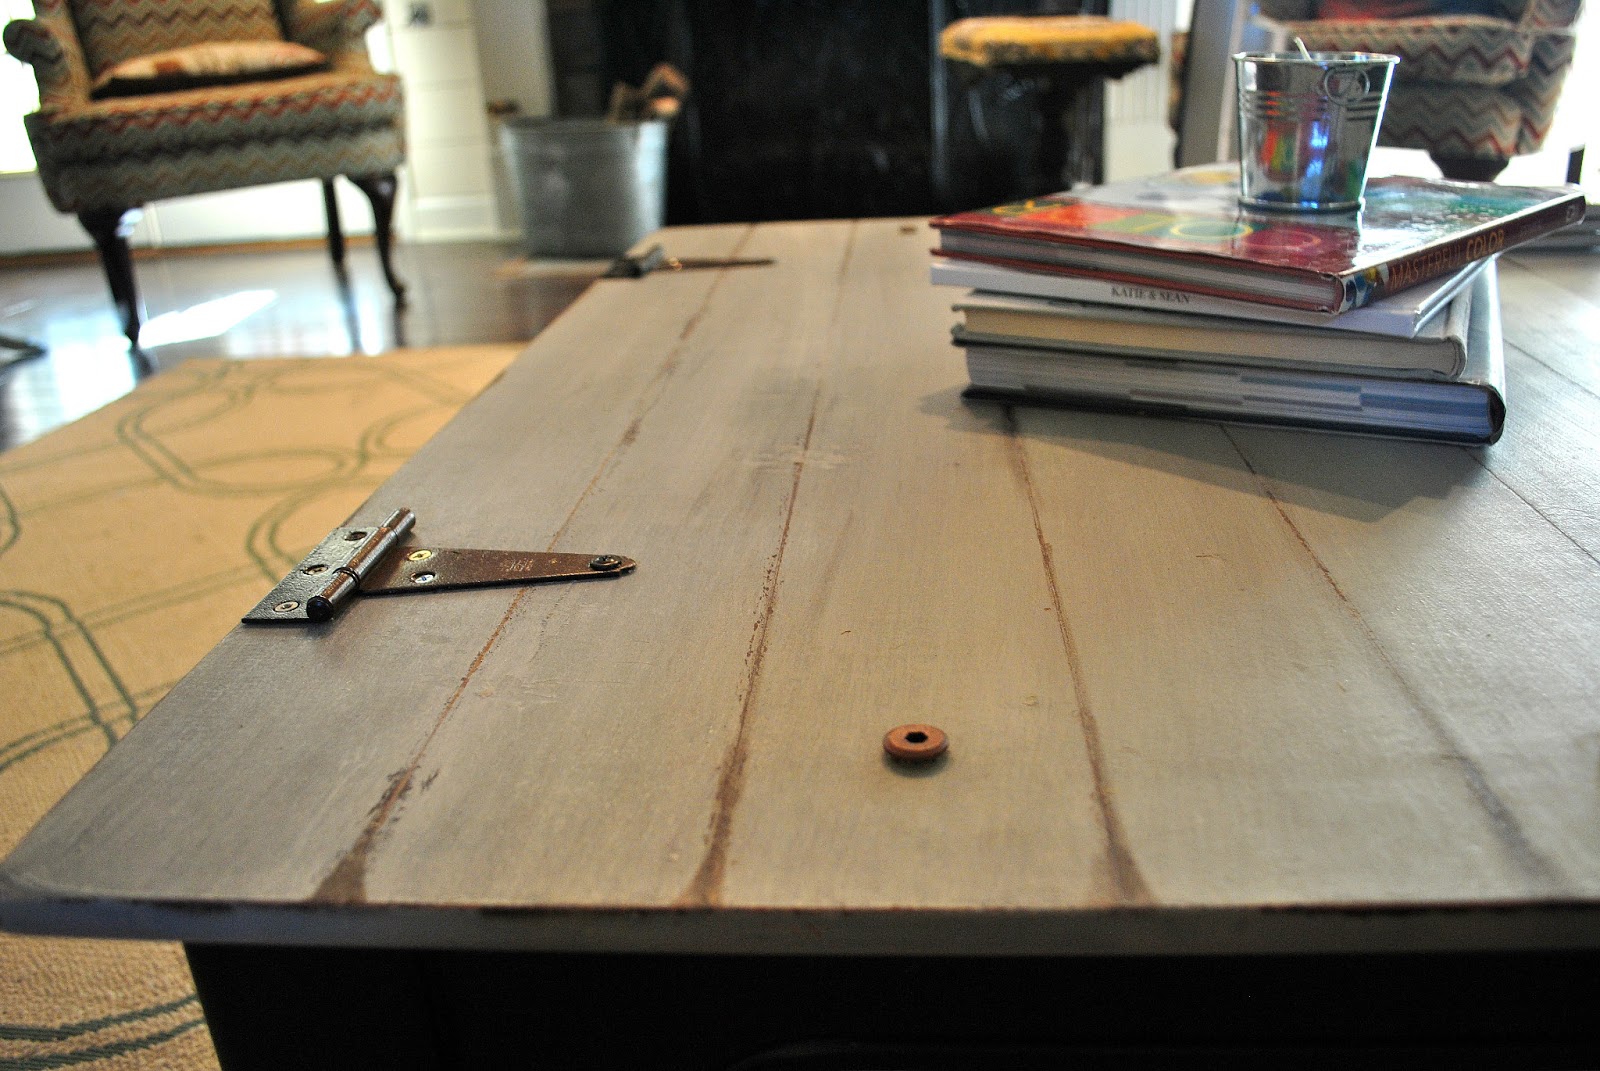
 I painted  a coat of light gray paint over the surface. Then added a little white paint and watered it down, and quickly gave it a streaky coat over that. Since it was lightly painted and watered down, it dried quick and I repeated that step, adding more white to lighten it again, and more water to thin it out. 
  

As a last touch up coat, I added streaks of gray and light gray until I liked it. I used a board as a straight edge and drug a nail along the table to scrape the gray paint off. I spaced it every 3 inches or so to create a faux plank top.


I thickened the line at the ends with a little brownish/black paint to round it off. And for the last step, I applied Minwax Paste Finishing Wax to get a protected, hard, smooth finish.


I picked up two hinges at the hardware store and spray painted them in layers of dark brown, metallic, and hammered spray paints and attached them with mismatched screws. Then screwed in some copper bolts at the ends of the planks. The legs stayed black, at least until I find some casters that I like to replace them with.


Here's the After:


I love how the gray-washing turned out, giving it dimension and aged character.

Distressing close-up:


It reminds me of a castle door.

And it fits in so much better now. There's a level of comfort to having distressed furniture in your home. The more use, abuse, and "uh-oh"s, the better!


Thanks for stopping by!
The Grays