
I cannot tell you how excited I am with how this next project turned out! And the fact that it involved ridding our house of a little more carpet makes me simply giddy. I feel a little more free every time we take another load out to the street that has been replaced with something smooth and clean.
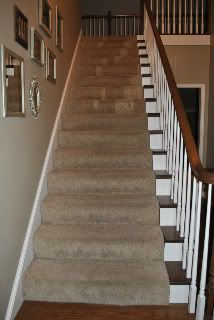
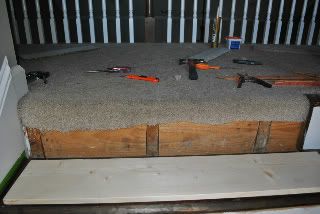
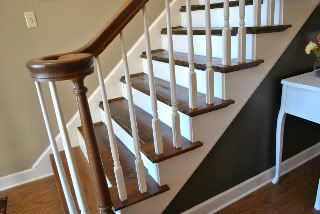
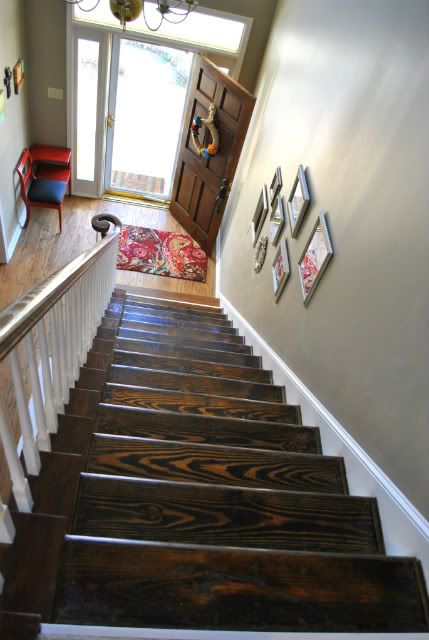
Considering our staircase is the FIRST thing you lay eyes on when you step through our front door into the entry, it is definitely a statement-maker. Except, until now, the statement has been "I'm old, out of style, tired...And dogs, cats, and kids have run all over me." It was even more gross to think that it was not our dogs, cats, and kids that had worn it down and smushed funk all into the fibers.
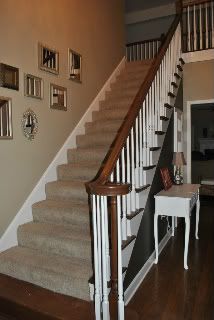
Before:
A staircase makeover was a must! But as always, it wasn't going to be as cut and dry as it seems most staircase redo's are in the blog world. I did not pull back the carpet to find oak treads with a perfect bullnose, just in need of refinishing. I wouldn't even find a simple soft wood tread from wall to rail. No, ours had to make me think a little more.
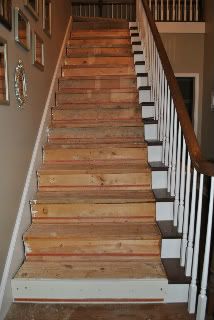
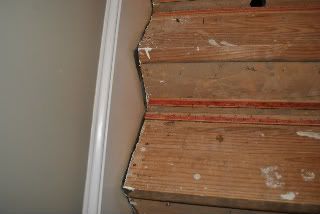
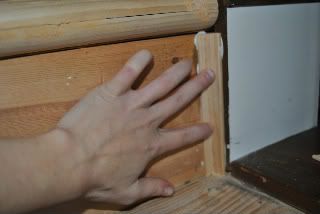
Because our stairs were carpeted, but had a "false-tread" on the ends (that piece of wood on the right side), the actual step after carpet removal was lower than the wood end at the baluster. I didn't want to pay $30/oak tread x 14 steps, and I also didn't want to pay to top with pine just so it would all be even across when they already were pine underneath. SO I got creative with trim molding and made the transition work pretty darn well!
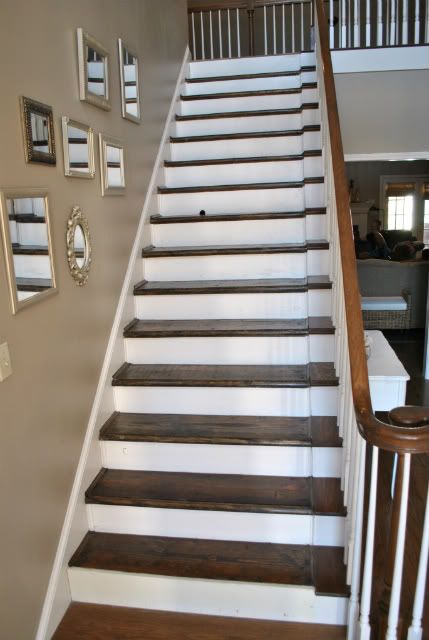
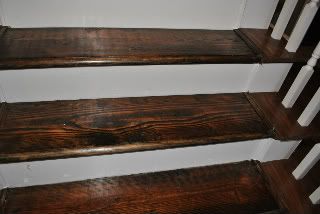
This is what they look like AFTER:
Here's how the dirty work went down...
I took off President's Day to have a long weekend to complete the project. I had everything I needed to start Saturday am, but on a whim...at 8:00 on Thursday night, I just sensed the nastiness of the carpet suffocating me all the way in the living room. I jumped out of my chair and removed all the carpet right then. It took about 8 seconds.
Considering our staircase is the FIRST thing you lay eyes on when you step through our front door into the entry, it is definitely a statement-maker. Except, until now, the statement has been "I'm old, out of style, tired...And dogs, cats, and kids have run all over me." It was even more gross to think that it was not our dogs, cats, and kids that had worn it down and smushed funk all into the fibers.
Before:
A staircase makeover was a must! But as always, it wasn't going to be as cut and dry as it seems most staircase redo's are in the blog world. I did not pull back the carpet to find oak treads with a perfect bullnose, just in need of refinishing. I wouldn't even find a simple soft wood tread from wall to rail. No, ours had to make me think a little more.
Because our stairs were carpeted, but had a "false-tread" on the ends (that piece of wood on the right side), the actual step after carpet removal was lower than the wood end at the baluster. I didn't want to pay $30/oak tread x 14 steps, and I also didn't want to pay to top with pine just so it would all be even across when they already were pine underneath. SO I got creative with trim molding and made the transition work pretty darn well!
This is what they look like AFTER:
Here's how the dirty work went down...
I took off President's Day to have a long weekend to complete the project. I had everything I needed to start Saturday am, but on a whim...at 8:00 on Thursday night, I just sensed the nastiness of the carpet suffocating me all the way in the living room. I jumped out of my chair and removed all the carpet right then. It took about 8 seconds.
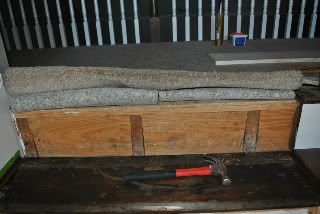
Of course, I expected the tack strips. This perfect gaping hole was not, however, expected. It gave me the creeps on first glance. I imagined "The Borrowers" hanging out inside, those creepy little miniature people from the movie that hide in a house and steal things from the humans that they need to live.
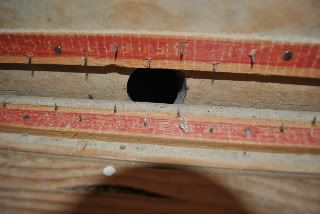 I forged forth, first removing the tack strips one by one. If you place the flathead just to the side of one of the nails that are going into the step, and hammer it a few times, repeating at each nail, it will release without breaking or causing too much damage.

The steps weren't flush with the wall either, so I knew I'd need molding on both sides.
The more I got the hang, the bigger the pieces were. I took all of them off that Thursday night, which was a WONDERFUL way to start Saturday morning. (Friday night is game night:)

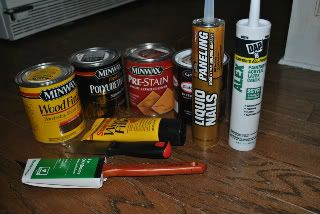
For this project, I gathered:
Pre-Stain Conditioner (To prepare soft woods, like pine, for stain)
Minwax Jacobean stain
Minwax Poly
Semi-Gloss paint in "Sunlit White"
Liquid Nails
Paintable Caulk
Caulking gun
Wood Filler (Stainable) ( I had to get more 2x)
Putty knife
Brush for Oil based paints and stains
Roughly 40 linear feet of cove molding
Roughly 80 linear feet of quarter round
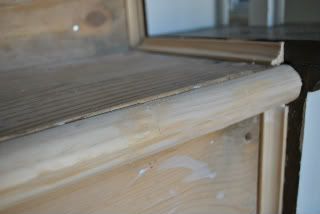
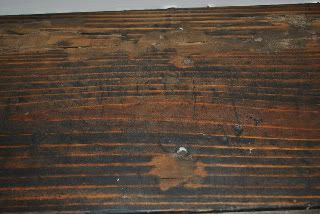
In addition to the treads not being level from one end to the other because of the false end tread, after the bottom 4 steps, the rest had a 1/8th inch gap running all the way across between 2 different pieces of the tread. I used caulk to fill it...
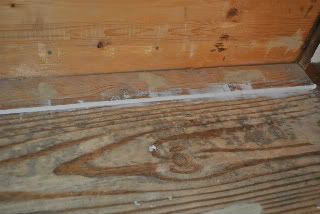
Then stainable wood filler to cover over the caulk so it could be stained with the rest of the step.
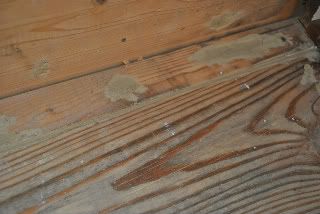
After the gaps were filled in, I went step by step filling in all the holes and gouges, then sanded everything smooth. I made another check for holes, sanded again, and cleaned everything up.
Already I had scaled the staircase 86 times. And I was just getting started...
Now for the bullnose. I checked out out the bullnoses they sell at Home Depot in the stairs section, but they were about 10 inches long and were roughly $13 each. I would've needed 3 per step! Aint happenin'
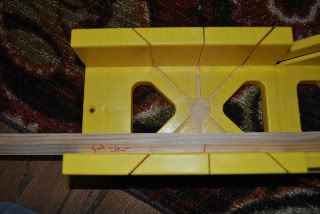
So I played around in the molding section with a few different curved pieces of trim, but then realized I could place 2 pieces of quarter round together to make a semi-circle just like a bullnose!
 {Holding 2 pieces of quarter round together}
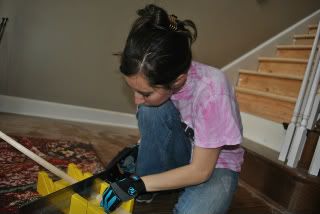
I measured each piece to fit, using our cheap miter box and saw.
Then placed them on the edge of each step with Liquid Nails, taping with painter's tape to hold.
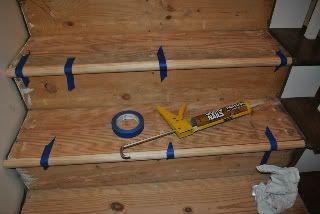
I measured each step individually, in case there were any variations, and cut accordingly. (There's my cute little work gloves I wanted being put to work!)
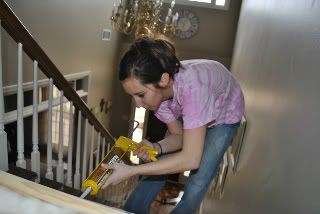
I worked my way all the way to the top step, each time the pain in my back screamed a little louder from the constant curvature. I might pay for this project when I'm older when that hump in my back reappears...
Finally the last bullnose was on!

Next, I used cove molding to smooth out the transition from the false tread to the step and riser, on both sides.
 The vertical pieces of molding that were glued to the riser were cut straight across, while the horizontal pieces that were next to the step were cut at a 45 degree angle to fit nicely.
This was the only part where I solicited help. I cut about half of the pieces, enough for one side of the staircase, and was about to lose my mind. My arm was aching and I looked up to see the 14-step staircase and a whole other side to finish...14 steps times 2 pieces to cut per step. I complained loud and long enough, then resorted to whining, when my help, in the form of my husband, came running.
SO...After all the steps had been sanded and cleaned a million times and all molding was in place, it was time to stain. By this point I had walked up...down...up a couple more...up all the way...then down again...then up...these stairs approximately 1200 times. Quads were burning and I couldn't WAIT to take a bath!!
I stained all the steps and molding beside the treads with Minwax Jacobean using an oil brush and a rag to wipe. One coat only! The amount of time it sits determines how dark it gets better than adding another coat. And with 2, you run the risk of it staying tacky and never really drying. Mine dried overnight and still needed a little time the next day to fully harden and not feel sticky. No windows near so poor ventilation.
Note: I didn't stain every other step like most would, because I was able to walk up and down using the false end tread by the rail...so I guess it was good for something.
After the stain dried, I started to paint the risers. You can tape off your edges, but I'm more accurate free handing the straight edge than taping. Since I painted AFTER staining, I was able to cover any places where stain extended to the riser.

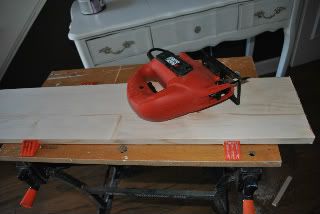
I was in for another surprise when I removed the carpet off the top riser...there was not a smooth riser straight across so I would need something to cover that.
I bought a spruce board, another soft wood, and cut it to fit the space for the top riser using the jigsaw.
I cut most of the overhanging carpet, leaving just a couple inches to staple over the edge. Then once the board was painted white, I nailed it into place, covering the carpet. If we get around to changing out the flooring upstairs, we can remove it.
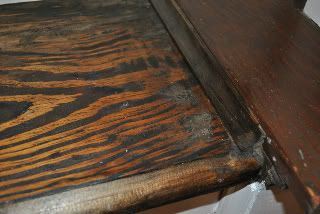
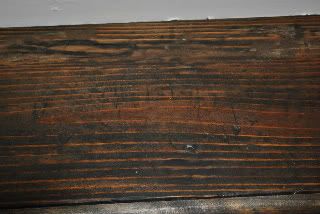
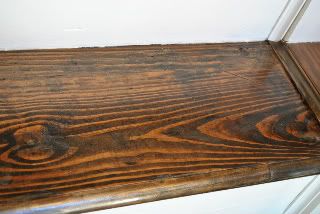
The last step before poly'ing, was to do some touch ups. The places that were wood-puttied caused me to lose the wood grain, so I faked it back in with a little paint brush and acrylic paint. In the pic below you see the smudges where the wood filler was in the bottom right corner.
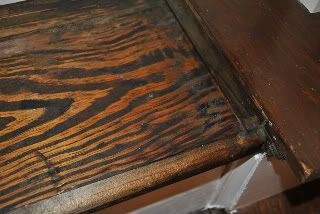
And here's that same spot with the wood grain brought back using paint...
I did just a little on each step to cover only the noticeable imperfections.
Again, here's a step before touch-ups:
And the same step after:
The most fun step was painting on the polyurethane. I made sure each step was completely clean before brushing on. I loved adding that last touch of shine to bring them to life! I started at the top and worked my way down. I applied the poly and it dried overnight, then I applied one more coat. And then I retreated to my bed for the most melt-into-your-sheets, sink-into-your-mattress, float-on-clouds sleep EVER.
Here's a reminder BEFORE:
And AFTER:
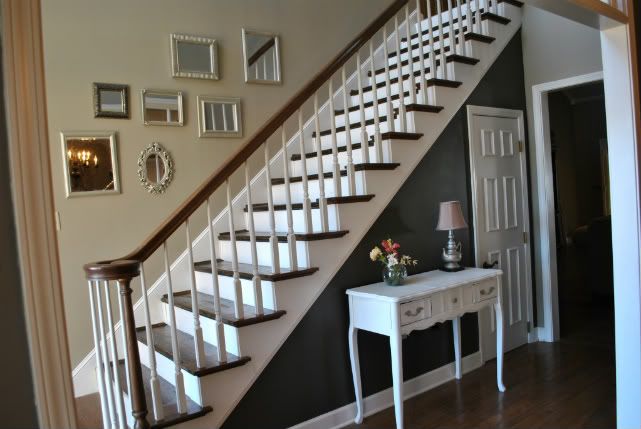


I'm really happy with how well the stain color matched the end tread and stair rail. I snapped a pic on my phone and picked the can based on that.
Beautiful finish!
 For some reason it didn't cross my mind that this project would be the equivalent of handcuffing myself to the stair-master at the gym and not being able to stop 3 days straight! But, I got a beautiful staircase afterwards and a tighter butt as a bonus!
I completed it in one long weekend. They look authentically antiqued and add SO much more character than the smelly, funk-infested carpet.
What do you think??
Follow @ktgray13
I forged forth, first removing the tack strips one by one. If you place the flathead just to the side of one of the nails that are going into the step, and hammer it a few times, repeating at each nail, it will release without breaking or causing too much damage.The steps weren't flush with the wall either, so I knew I'd need molding on both sides.
The more I got the hang, the bigger the pieces were. I took all of them off that Thursday night, which was a WONDERFUL way to start Saturday morning. (Friday night is game night:)
For this project, I gathered:
Pre-Stain Conditioner (To prepare soft woods, like pine, for stain)
Minwax Jacobean stain
Minwax Poly
Semi-Gloss paint in "Sunlit White"
Liquid Nails
Paintable Caulk
Caulking gun
Wood Filler (Stainable) ( I had to get more 2x)
Putty knife
Brush for Oil based paints and stains
Roughly 40 linear feet of cove molding
Roughly 80 linear feet of quarter round
In addition to the treads not being level from one end to the other because of the false end tread, after the bottom 4 steps, the rest had a 1/8th inch gap running all the way across between 2 different pieces of the tread. I used caulk to fill it...
Then stainable wood filler to cover over the caulk so it could be stained with the rest of the step.
After the gaps were filled in, I went step by step filling in all the holes and gouges, then sanded everything smooth. I made another check for holes, sanded again, and cleaned everything up.
Already I had scaled the staircase 86 times. And I was just getting started...
Now for the bullnose. I checked out out the bullnoses they sell at Home Depot in the stairs section, but they were about 10 inches long and were roughly $13 each. I would've needed 3 per step! Aint happenin'
So I played around in the molding section with a few different curved pieces of trim, but then realized I could place 2 pieces of quarter round together to make a semi-circle just like a bullnose!
{Holding 2 pieces of quarter round together}I measured each piece to fit, using our cheap miter box and saw.
Then placed them on the edge of each step with Liquid Nails, taping with painter's tape to hold.
I measured each step individually, in case there were any variations, and cut accordingly. (There's my cute little work gloves I wanted being put to work!)
I worked my way all the way to the top step, each time the pain in my back screamed a little louder from the constant curvature. I might pay for this project when I'm older when that hump in my back reappears...
Finally the last bullnose was on!
Next, I used cove molding to smooth out the transition from the false tread to the step and riser, on both sides.
The vertical pieces of molding that were glued to the riser were cut straight across, while the horizontal pieces that were next to the step were cut at a 45 degree angle to fit nicely.This was the only part where I solicited help. I cut about half of the pieces, enough for one side of the staircase, and was about to lose my mind. My arm was aching and I looked up to see the 14-step staircase and a whole other side to finish...14 steps times 2 pieces to cut per step. I complained loud and long enough, then resorted to whining, when my help, in the form of my husband, came running.
SO...After all the steps had been sanded and cleaned a million times and all molding was in place, it was time to stain. By this point I had walked up...down...up a couple more...up all the way...then down again...then up...these stairs approximately 1200 times. Quads were burning and I couldn't WAIT to take a bath!!
I stained all the steps and molding beside the treads with Minwax Jacobean using an oil brush and a rag to wipe. One coat only! The amount of time it sits determines how dark it gets better than adding another coat. And with 2, you run the risk of it staying tacky and never really drying. Mine dried overnight and still needed a little time the next day to fully harden and not feel sticky. No windows near so poor ventilation.
Note: I didn't stain every other step like most would, because I was able to walk up and down using the false end tread by the rail...so I guess it was good for something.
After the stain dried, I started to paint the risers. You can tape off your edges, but I'm more accurate free handing the straight edge than taping. Since I painted AFTER staining, I was able to cover any places where stain extended to the riser.
I was in for another surprise when I removed the carpet off the top riser...there was not a smooth riser straight across so I would need something to cover that.
I bought a spruce board, another soft wood, and cut it to fit the space for the top riser using the jigsaw.
I cut most of the overhanging carpet, leaving just a couple inches to staple over the edge. Then once the board was painted white, I nailed it into place, covering the carpet. If we get around to changing out the flooring upstairs, we can remove it.
The last step before poly'ing, was to do some touch ups. The places that were wood-puttied caused me to lose the wood grain, so I faked it back in with a little paint brush and acrylic paint. In the pic below you see the smudges where the wood filler was in the bottom right corner.
And here's that same spot with the wood grain brought back using paint...
I did just a little on each step to cover only the noticeable imperfections.
Again, here's a step before touch-ups:
And the same step after:
The most fun step was painting on the polyurethane. I made sure each step was completely clean before brushing on. I loved adding that last touch of shine to bring them to life! I started at the top and worked my way down. I applied the poly and it dried overnight, then I applied one more coat. And then I retreated to my bed for the most melt-into-your-sheets, sink-into-your-mattress, float-on-clouds sleep EVER.
Here's a reminder BEFORE:
And AFTER:

I'm really happy with how well the stain color matched the end tread and stair rail. I snapped a pic on my phone and picked the can based on that.
Beautiful finish!
For some reason it didn't cross my mind that this project would be the equivalent of handcuffing myself to the stair-master at the gym and not being able to stop 3 days straight! But, I got a beautiful staircase afterwards and a tighter butt as a bonus!I completed it in one long weekend. They look authentically antiqued and add SO much more character than the smelly, funk-infested carpet.
What do you think??
Resting my bones...
~Katie
~Katie

That looks great! It is such a transformation. I think you deserve a nice long massage to work out that curved back.
ReplyDeleteLOVE IT!!! xoxo
ReplyDelete